Week 3 – VSCode and Your Local Machine
Lecture Materials
- Monday Lecture Handout (Slides)
- Monday Lecture Handout (PDF)
- Wednesday Lecture Handout (Slides)
- Wednesday Lecture Handout (PDF)
To Read/For Your Reference
- Visual Studio Code
- Read these two articles by Julia Evans (one summarized in a comic below):
- Read this article by John Regehr: How to Debug
- You don't need to know what all the technical tools are in these readings (systems programming, CSS, divs, etc)
- From the Regehr article, focus on the vocabulary (symptom, bug, etc); from the Evans articles, focus on the vibes
- This article: https://drive.google.com/file/d/1zbMVZxsI1zOBPhSsvBi4kB5dPJuxyOJh/view?usp=sharing (Note that assigning an article doesn't necessarily mean we all agree with everything in it...)
Video Shorts
Lab Tasks
As usual, we publish these ahead of time, but they aren't guaranteed to be final until the start of lab on Tuesday.
Part 1 – SSH Keys & SCP
Step 1 SSH Keys
With the setup we've used so far this quarter, each time you log in to your course-specific account, you have to type the password. You might have noticed that during the skill demonstration you didn't have to type the password for our instructor accounts! Here, you'll learn how to configure that for yourself (it will save lots of time).
- In your local terminal (the one you opened in VSCode), run
ssh-keygen - Keep entering
<Enter>until the program shows some text it calls the "randomart image".- Note the path where the public key is saved (underlined below).
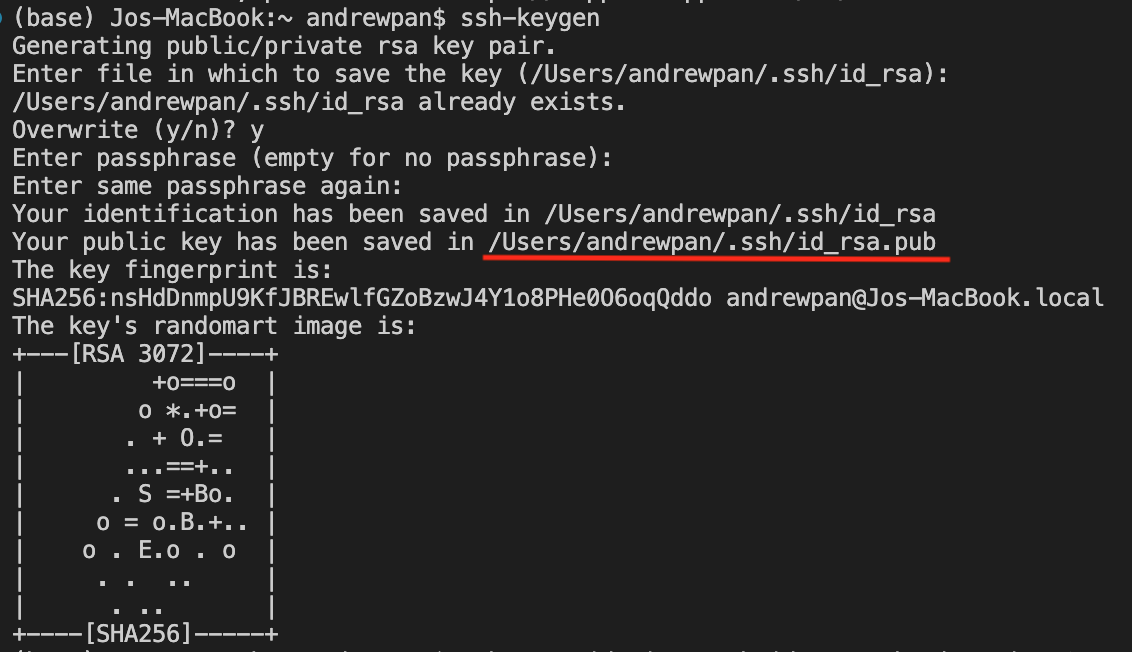
Write down in notes:
The ssh-keygen command generates a public-private key pair; use the cat command to print out the content of the public key only. Include the screenshot in the doc.
Step 2 SSH Copy ID
Now we have the key generated. Let’s configure it in our remote ieng6 server!
All you need to do is to type the following command (make sure to replace
YOUR_TRITONLINK_USERNAME with your actual username!):
ssh-copy-id -i ~/.ssh/id_rsa.pub YOUR_TRITONLINK_USERNAME@ieng6.ucsd.edu
Make sure you type in yes when it asks "Are you sure you want to continue connecting...?"
and then type in your TritonLink password to confirm. The whole terminal interaction
should look something like below:
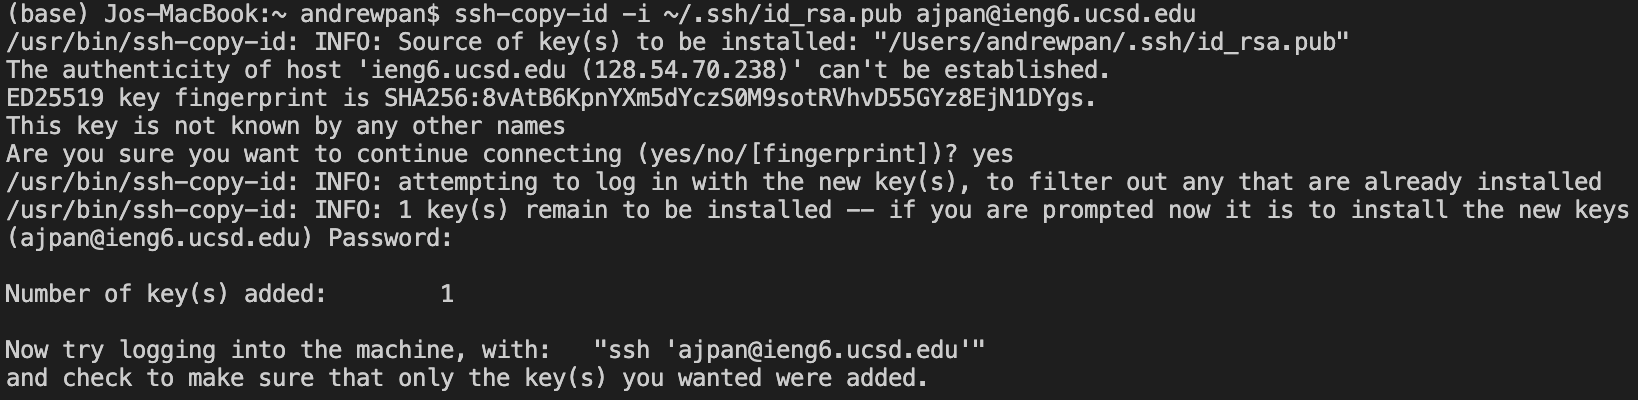
Write down in notes: What happened? What did you see? Put the screenshot of the output in the lab doc and explain what you think happened. Discuss with your peers!
So, to explain what happened, we first have to understand how ssh works. Imagine your server is like your home and you have a dog living inside. You can either enter your home with your keys or have your dog open it from the inside(it’s a very smart dog like a German Shepherd). For your dog to do that, the dog has to make sure you are you. So, you probably put a piece of your clothes with your scent at home for your dog to be familiar with your smell. Then every time you are outside, the dog will recognize you from your smell, that is the same from the clothes you left at home. Finally, your dog will open the door for you!
The dog here will be the ssh system, and the clothes you left inside is the public key that you just sent to the ieng6 server with ssh-copy-id. Now when you try to access ieng6, the ssh system will automatically locate the private key in your local computer and compare it with the public key that it stored to verify your identity!
Try to log in and log out one more time. You shouldn't need to enter your password. Yeah!
$ ssh user@ieng6.ucsd.edu
Write down in notes:
Check in the .ssh directory on ieng6; there should be a file named authorized_keys. Compare the content of authorized_keys with the ones of public-private key pair files; which file (public or private key) has the same content as authroized_keys. Why is that? Discuss with your peers.
$ exit
Step 3 SCP From Remote SSH to Local
Now that we have done the SSH to the remote server, we can now practice how to move files from our remote server to our local computer.
In order to move a file, we use the command SCP.

Reminder: What does echo do?
General format for echo is:
echo <insert text> > <insert name and type of file>
Use echo hello joe > hello.txt
The > arrow means write “hello joe” to a file called hello.txt
You can read man SCP to get more ideas on this.
SCP command usage: The scp command in Unix is used to securely copy files and directories between two locations over a network. It utilizes SSH (Secure Shell) for data transfer, ensuring that the data is encrypted and secure during the copy process. To use scp, simply specify the source file and the destination path where the file should be copied. You should not be on the remote server when executing this command. The point of SCP is to copy files from your local computer to your remote server.
The general format is as follows:
scp [file_name] remoteuser@remotehost:/remote/directory
scp hello.txt username@ieng6.ucsd.edu:~/
To copy entire folders or a couple of files we can use scp -r (-r means recursive copy which iterates through your entire folder and copies everything from one folder) to copy recursively.
Write down in notes:
Show a screenshot of you running the scp command above!
Part 2 – Connecting to Remote Server on Visual Studio Code
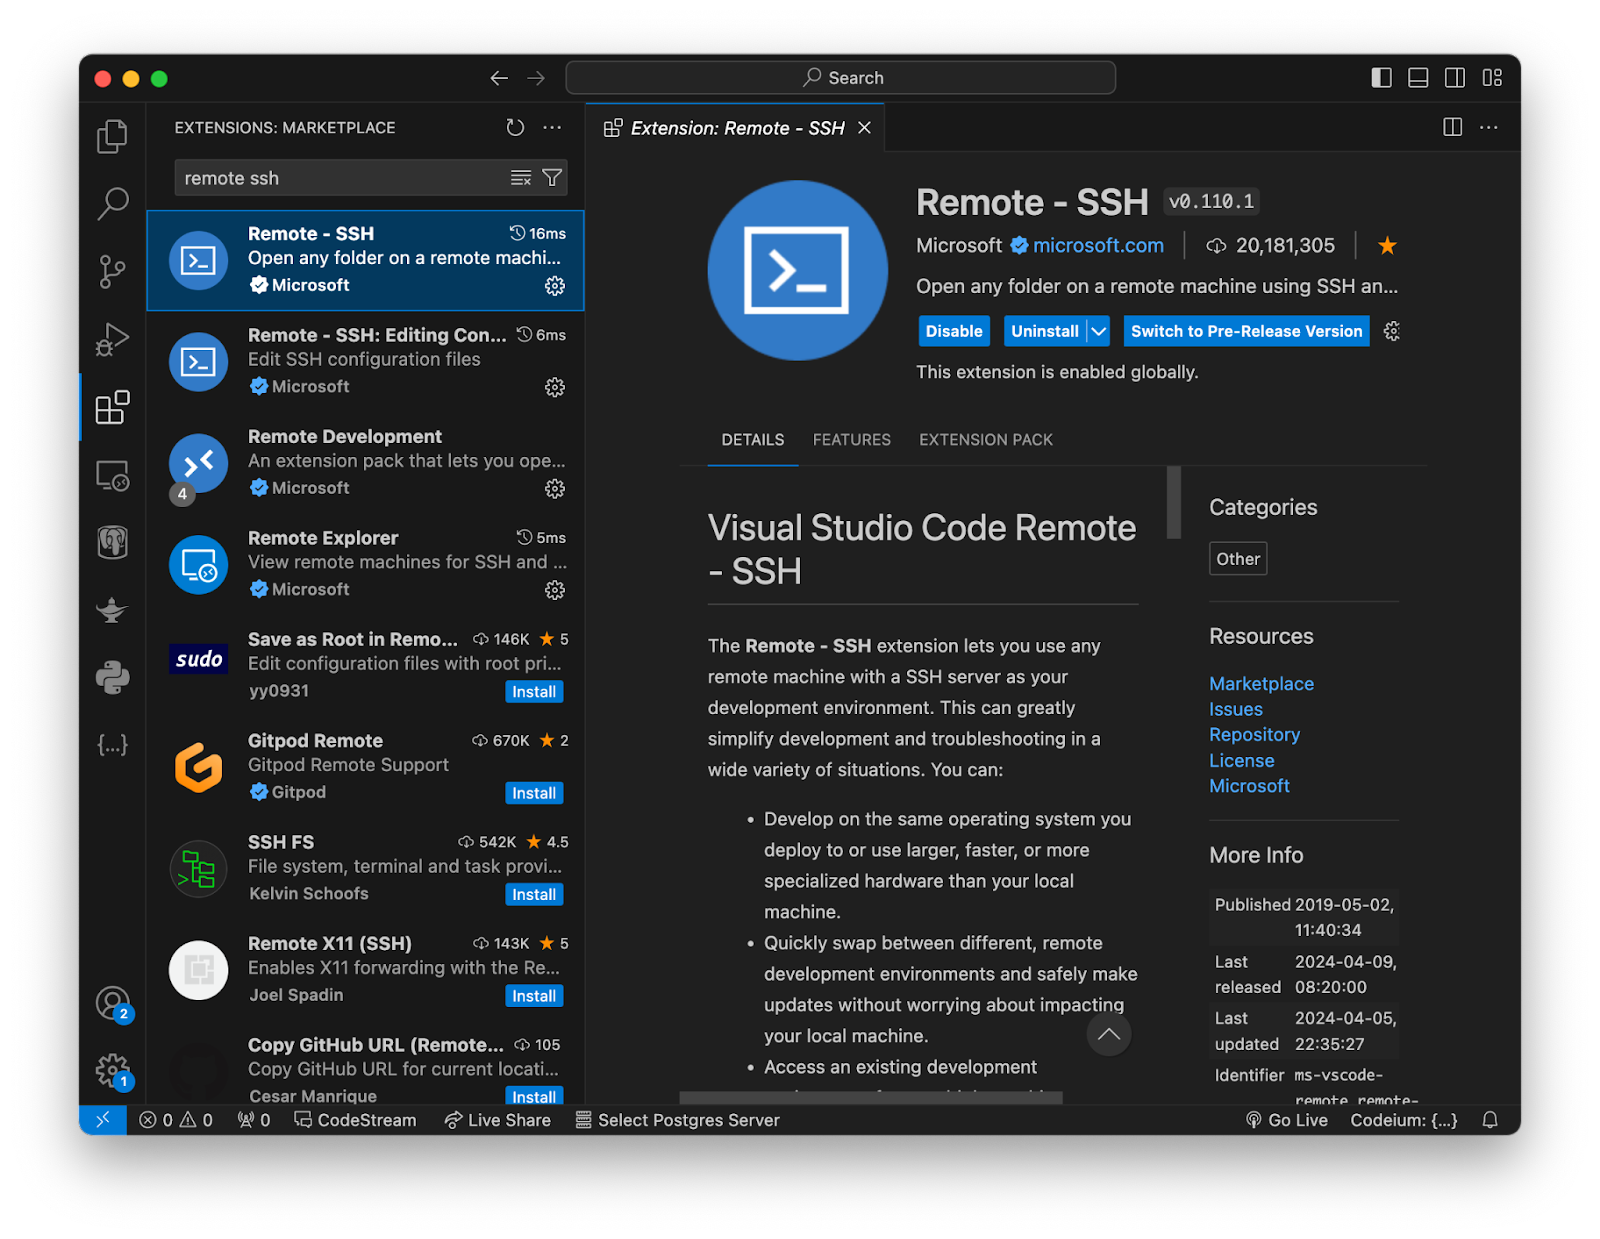
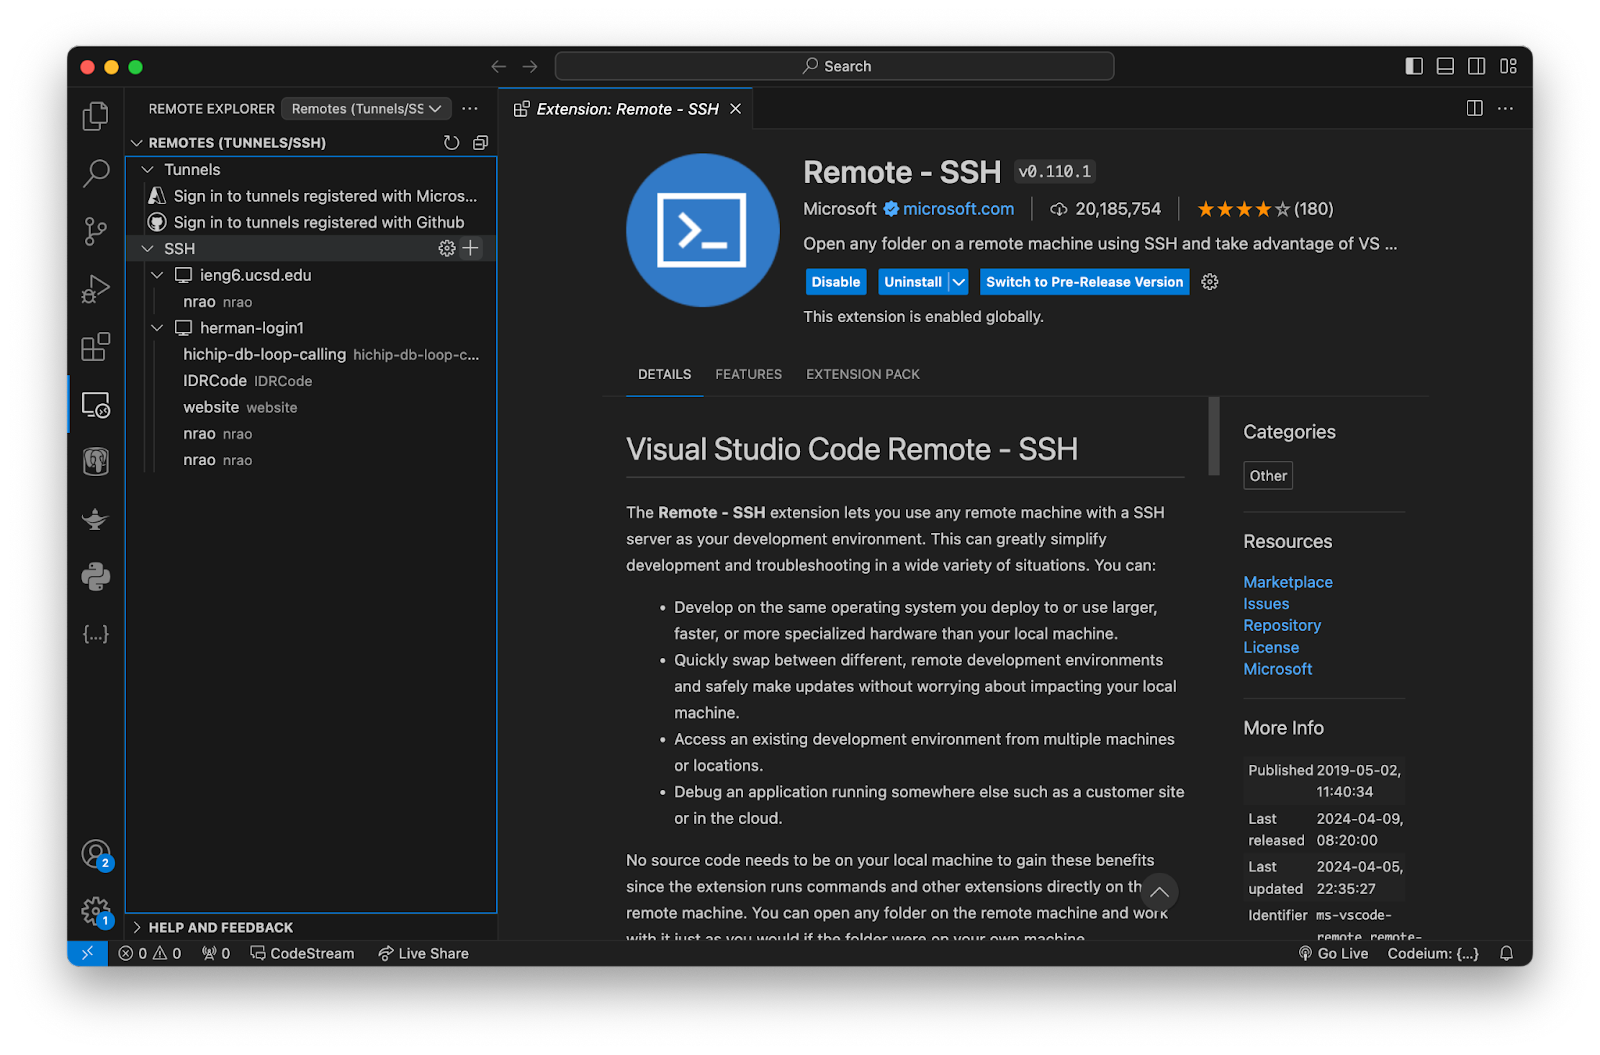
In this part, we are helping you set up your VSCode environment, so you can access files remotely on ieng6 without using the terminal. This paragraph below sums up the use the the VSCode extension that we ask you to install, Remote - SSH:
"The Visual Studio Code Remote - SSH extension allows you to open a remote folder on any remote machine, virtual machine, or container with a running SSH server and take full advantage of VS Code's feature set. Once connected to a server, you can interact with files and folders anywhere on the remote filesystem."
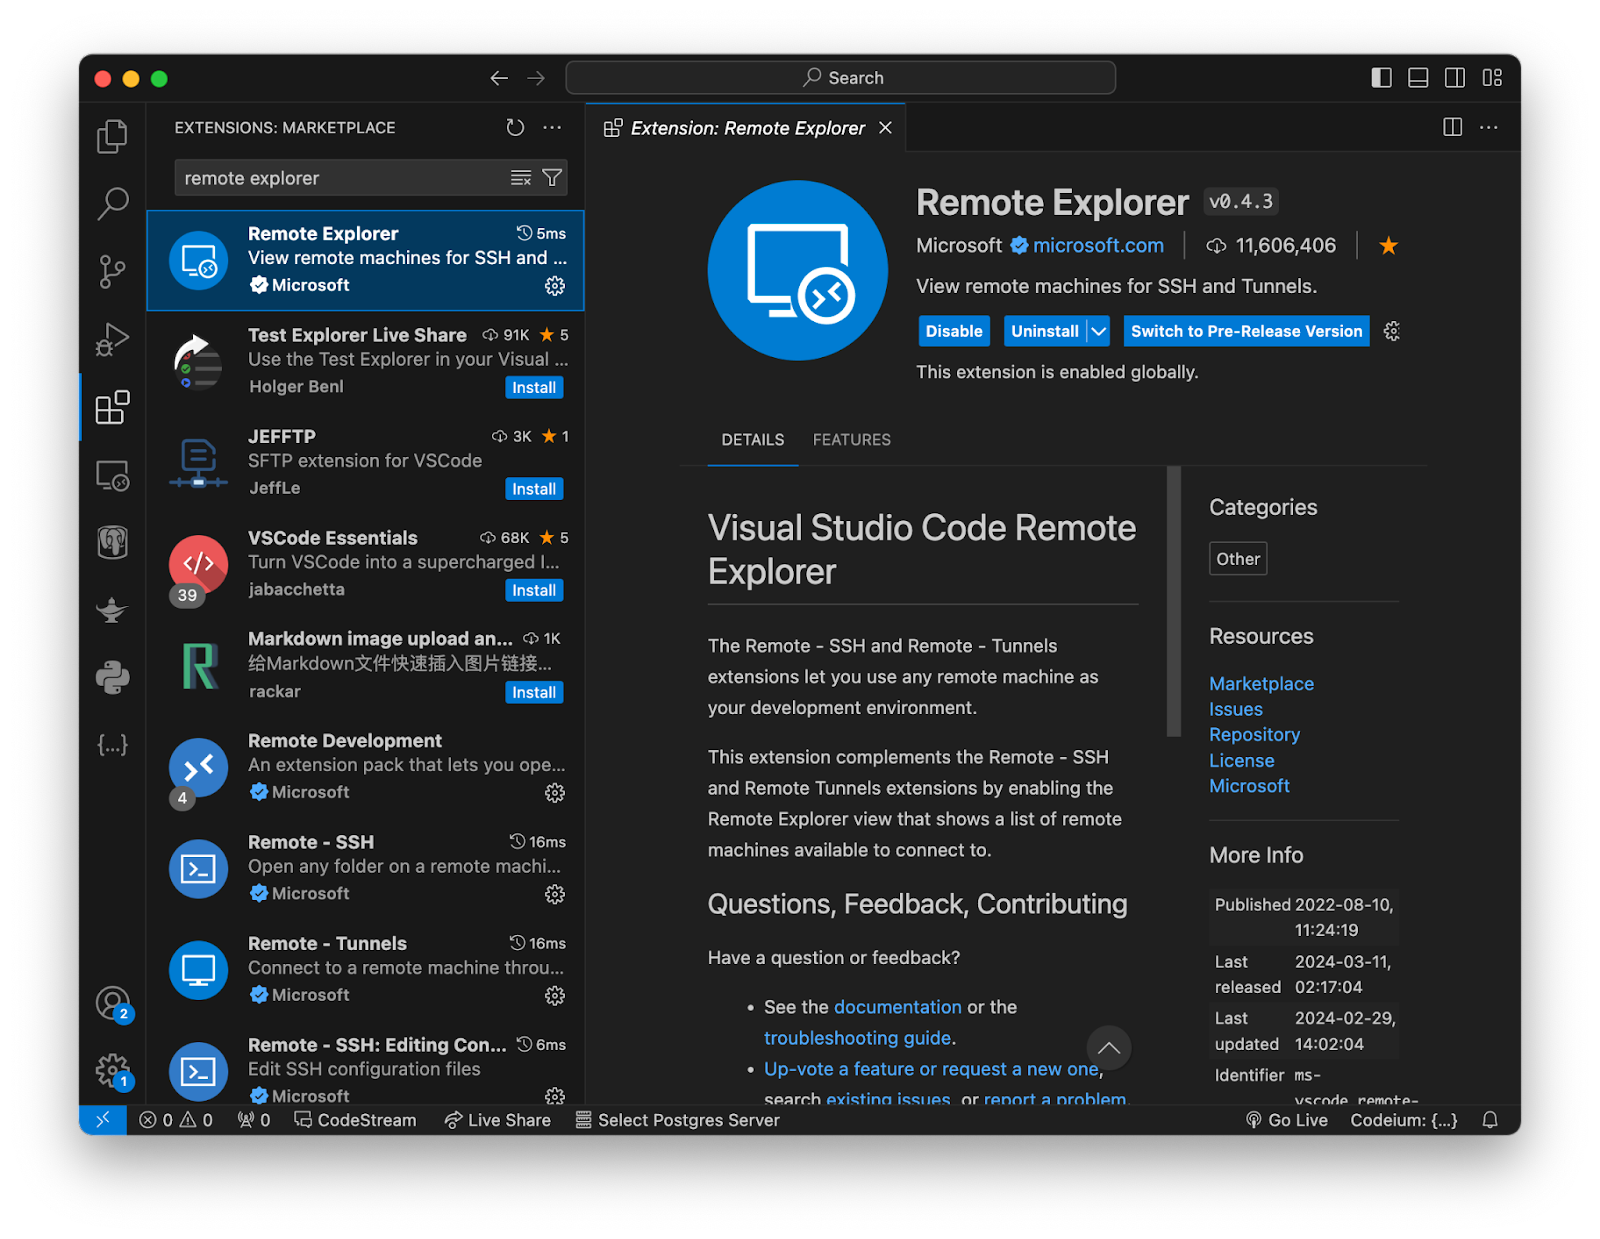
Step 1: Installation
Install the VSCode Remote - SSH plugin and Remote Explorer extensions.
Step 2: Connecting
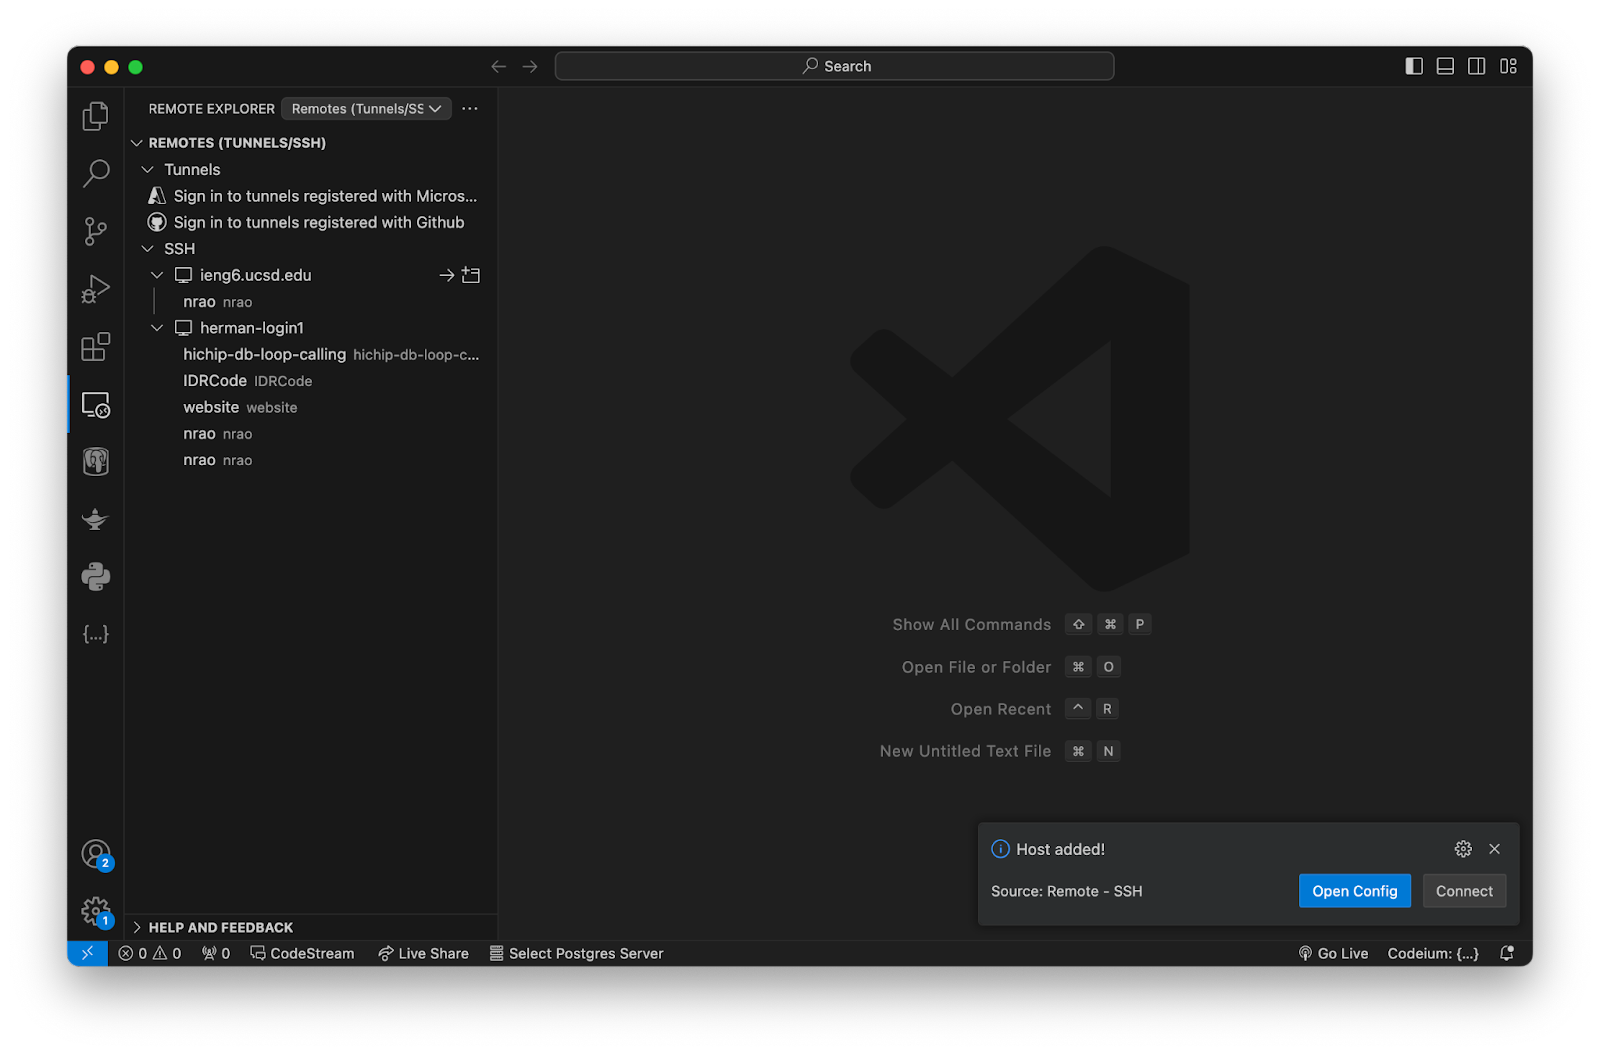
Click the SSH side tab and input your ssh info accordingly (ssh username@ieng6.ucsd.edu).
Click the "+" icon next to SSH and enter the ssh command to the pop up window
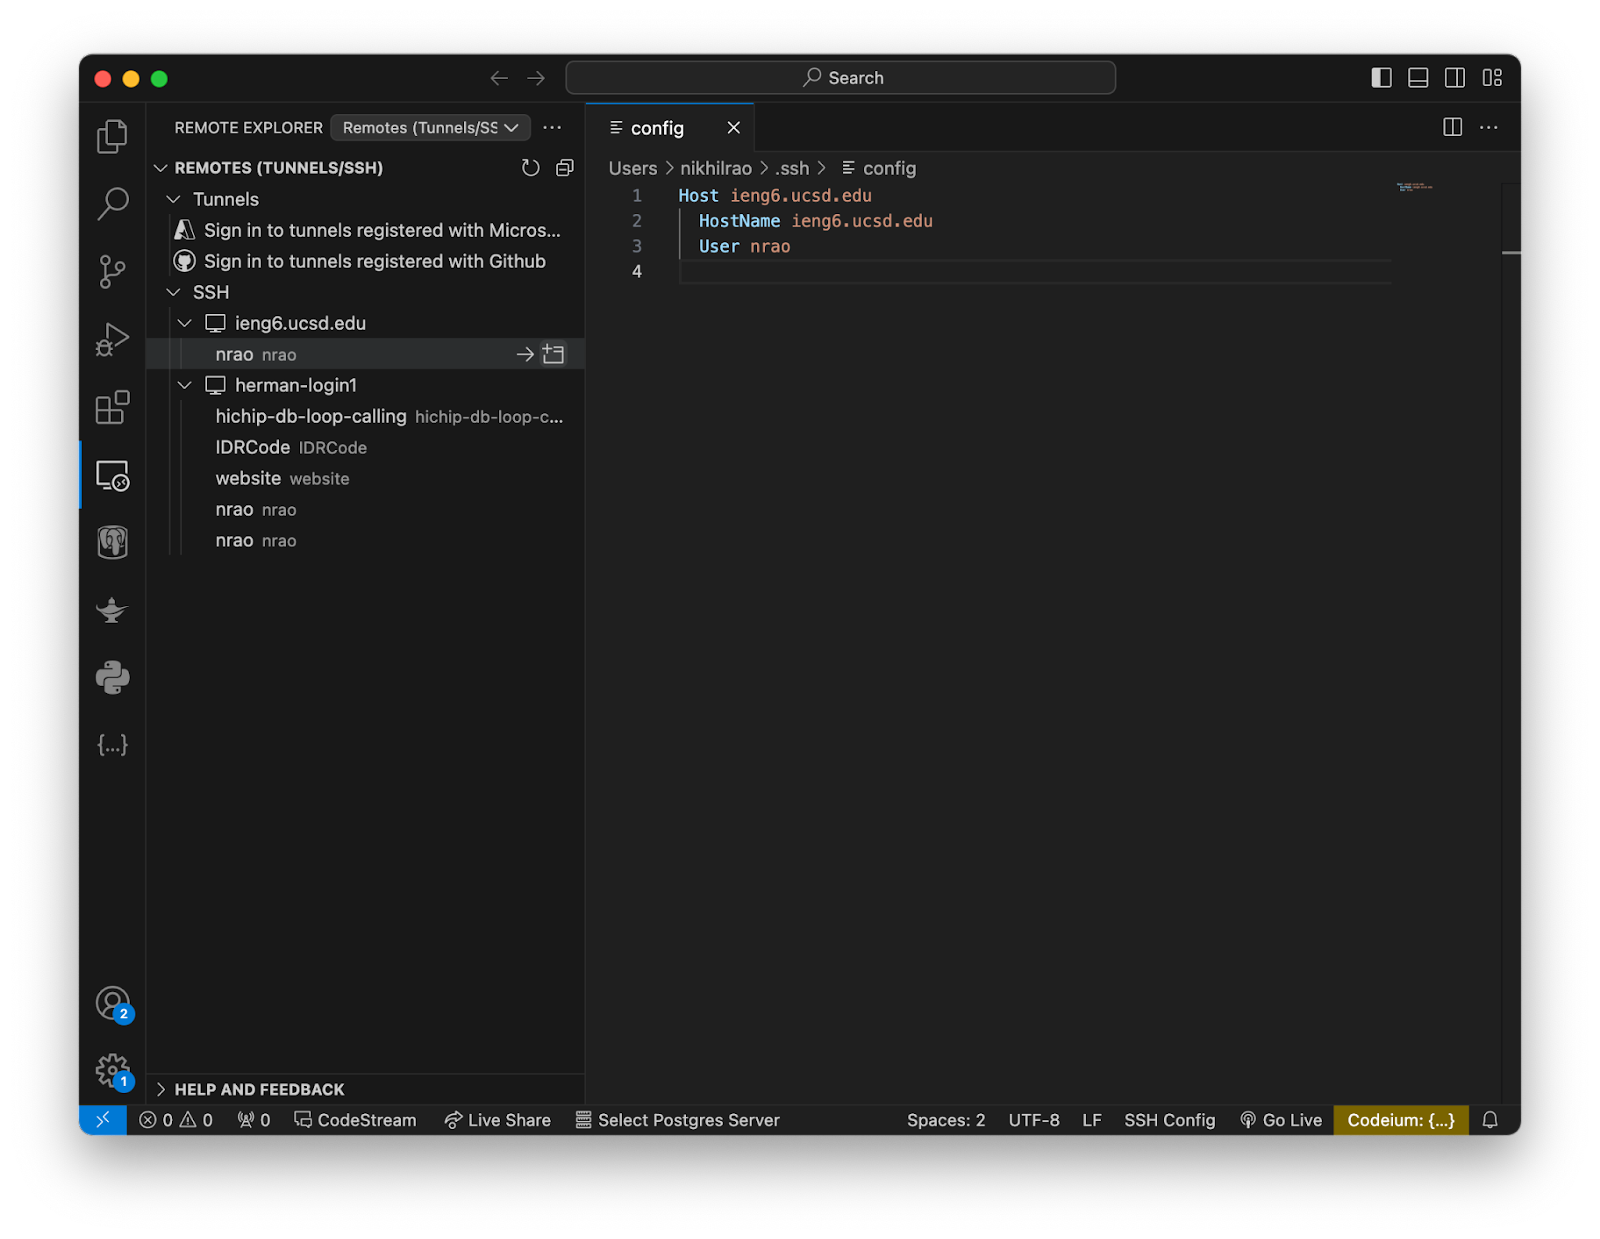
A popup window will open in the bottom right corner. Click on “Open Config”. This will open the configuration file for your SSH connection.
Close the VSCode application and restart.
In the remote explorer on the left-hand column, click the “Connect in new window” button next to your username to open a new ssh window for VSCode. Enter your password (if you haven’t already configured your ssh keys in part 1). This will open a new window connected to your remote server.
When you open a new terminal in this window, you will notice that it is automatically connected to ieng6. You can also configure your file explorer by clicking on “Open Folder” in the Remote Explorer.
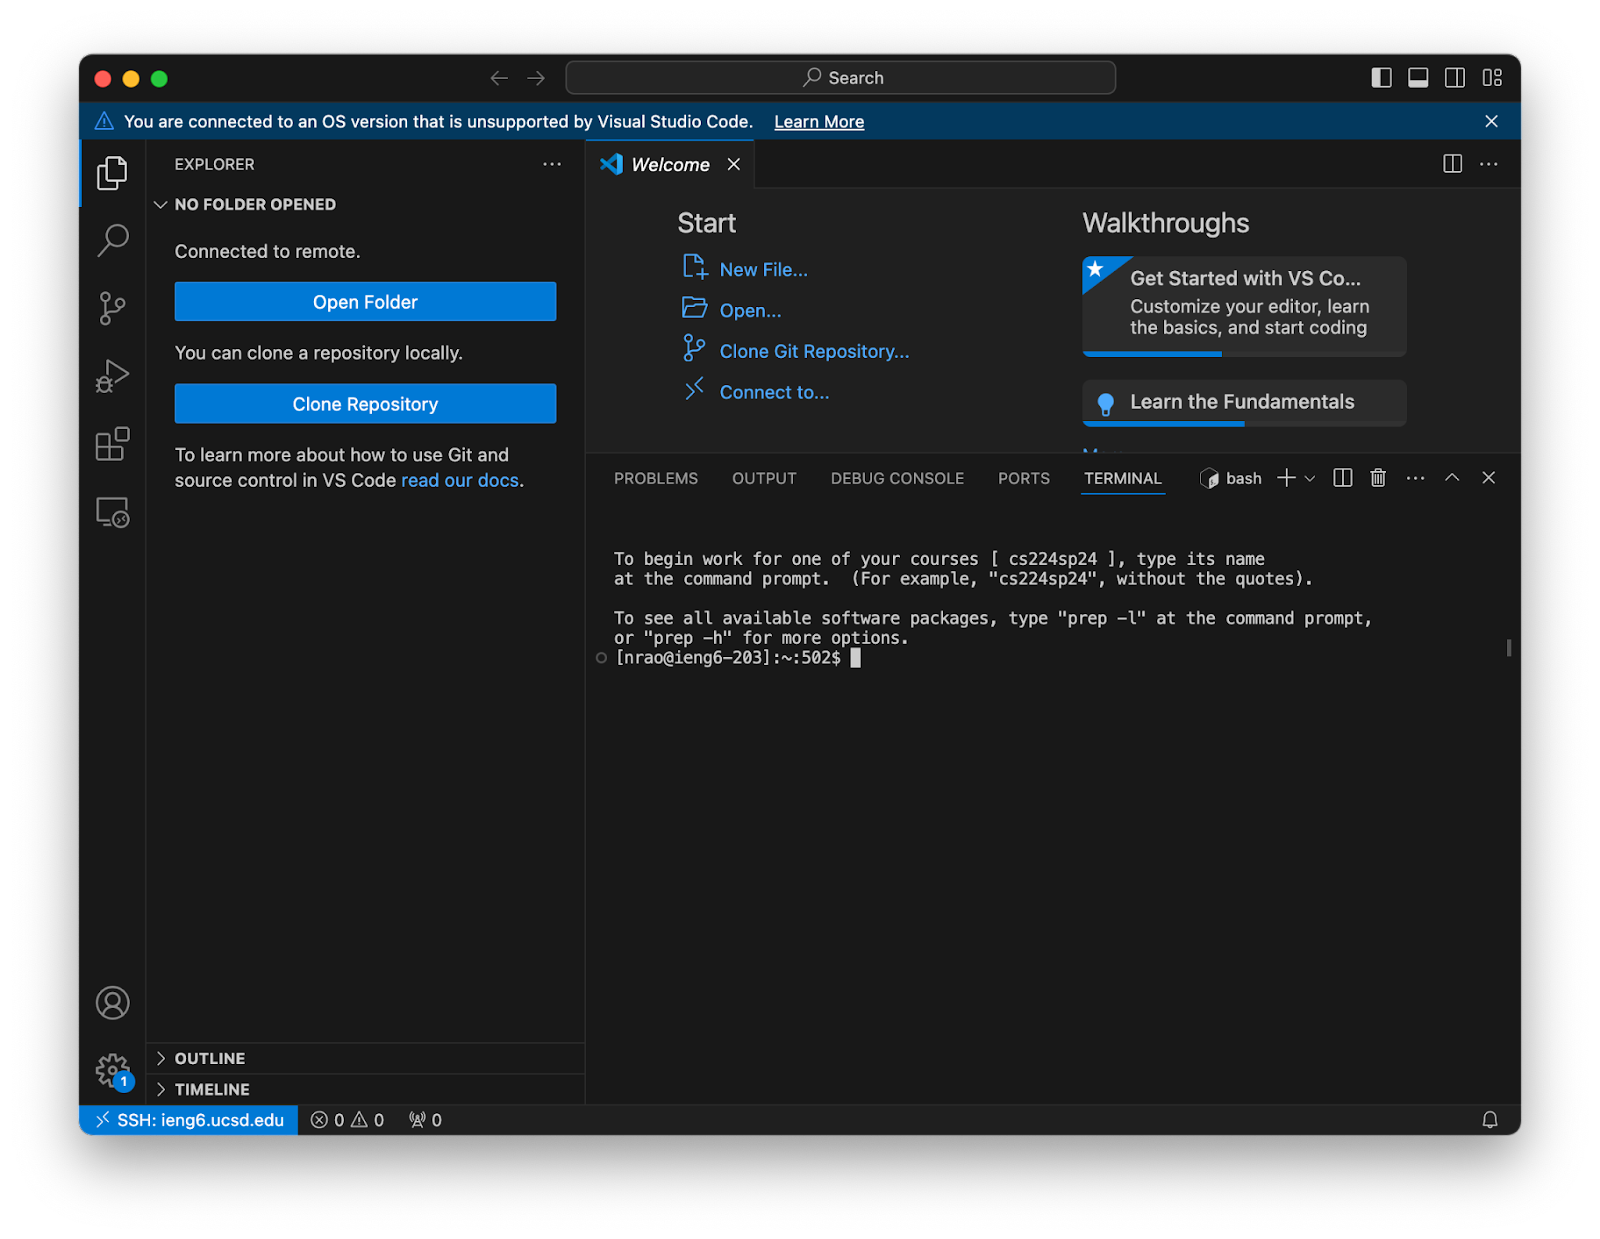
VSCode will open a pop-up asking which folder to open in the file explorer. Click “OK” to open the default folder for your user.
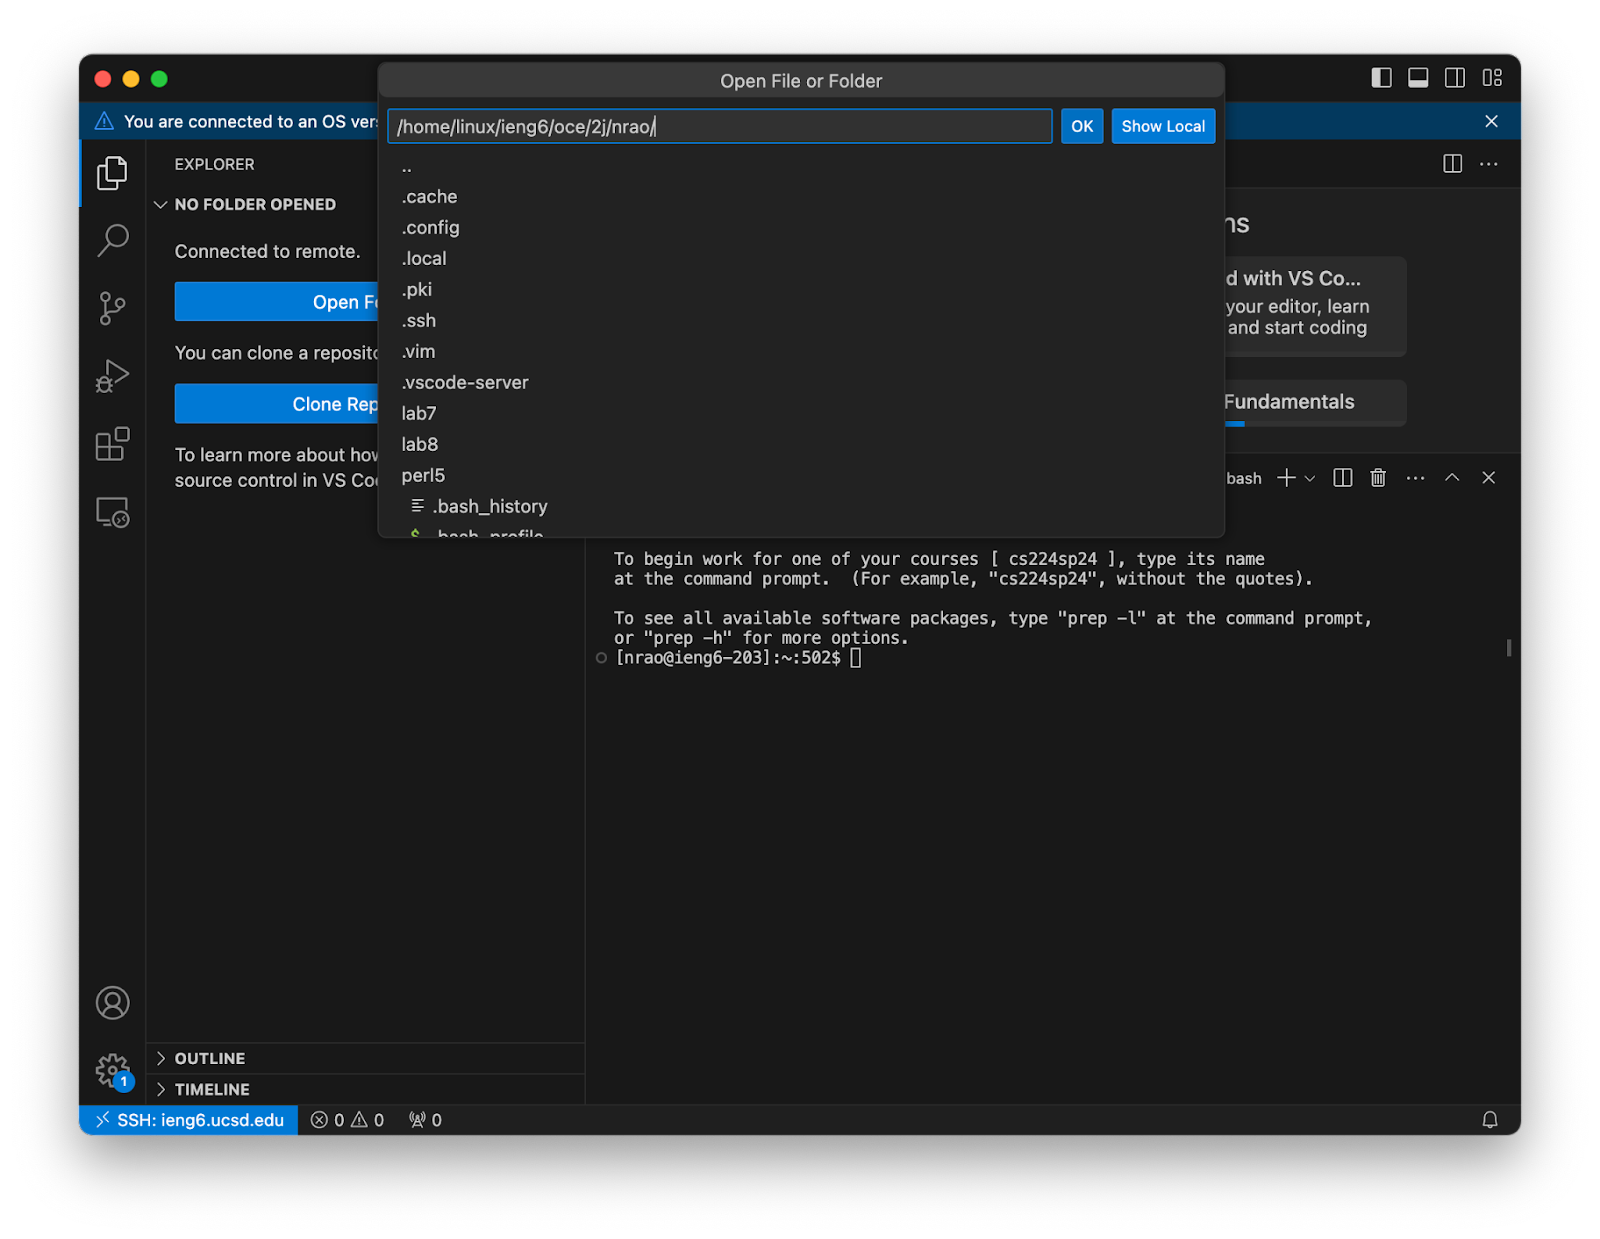
Go ahead and enter your password in the new window if prompted. Now you have your VSCode SSH ready! You are now able to use your remote machine just like how you use your local machine. Everything on your remote machine is now shown on your left tab, and you can edit the code on your remote machine directly on the VSCode editor!
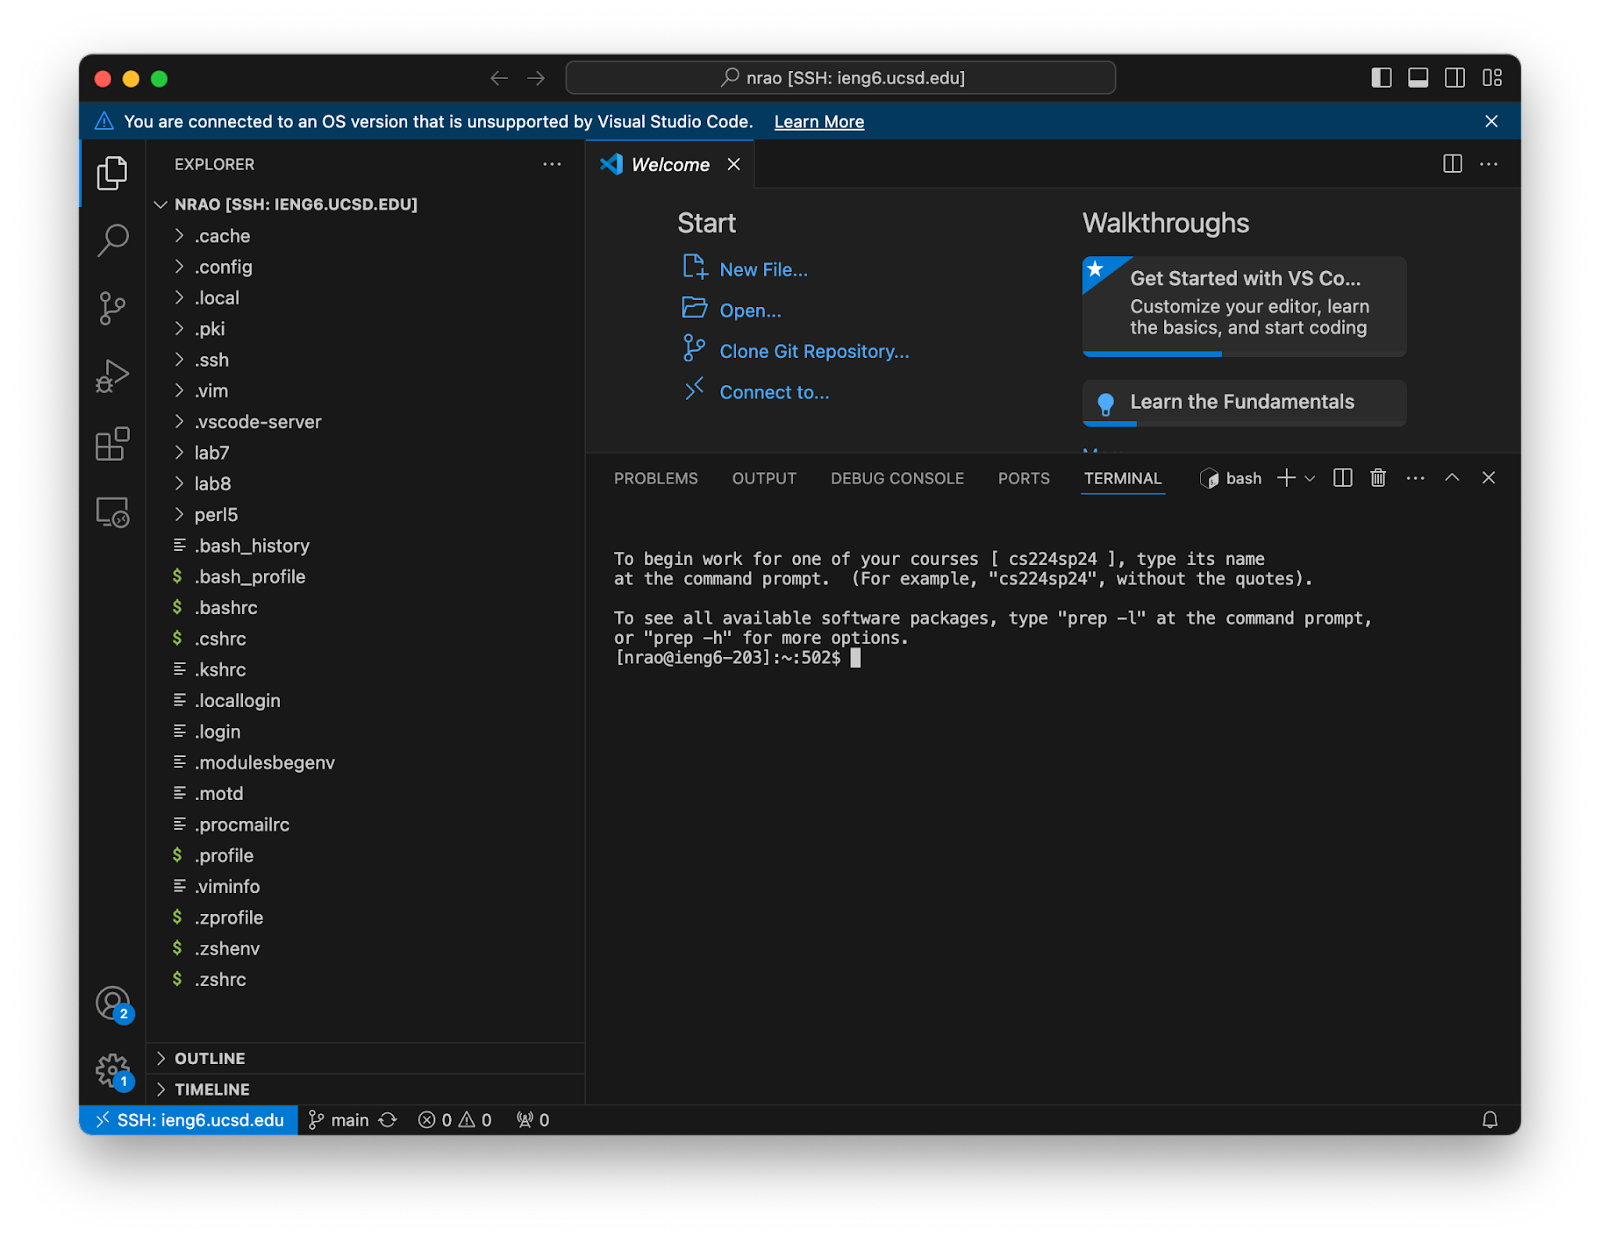
Write down in notes:
Show a screenshot of your VSCode opening the remote home directory of your ieng6 account.
Lab Report 2 - Servers and SSH Keys (Week 3)
As with the first lab report, you'll write this as a Github Pages page, then
print that page to PDF and upload to Gradescope. Make sure to use backticks ` around keywords such as commands, file names, paths, etc. to make them show up as code like cd. Lab report 2 is due Wednesday, April 24 by 10pm.
There are 3 parts:
Part 1
Write a web server called ChatServer that supports the path and behavior
described below. It should keep track of a single string that gets added to by
incoming requests. The requests should look like this:
/add-message?s=<string>&user=<string>
The effect of this request is to concatenate the string given after user=, a
colon (:), and then the string after s, a newline (\n), and then respond
with the entire string so far. That is, it adds a chat message of the form
<user>: <message>
So, for example, after
/add-message?s=Hello&user=jpolitz
The page should show
jpolitz: Hello
and after
/add-message?s=How are you&user=yash
the page should show
jpolitz: Hello
yash: How are you
(Some browsers might show this as How%20are%20you with a special character
replacing the spaces; don't worry about fixing that for this example. If you
want to look it up it has to do with URL encoding, a topic we won't address
right now.)
You can assume that the s= parameter always comes before the user=
parameter, and they are always separated by a & as shown above.
- Show the code for your
ChatServer, and two screenshots of using/add-message.
For each of the two screenshots, answer the followings three questions:
- Which methods in your code are called?
- What are the relevant arguments to those methods, and the values of any relevant fields of the class?
- How do the values of any relevant fields of the class change from this specific request? If no values got changed, explain why.
By values, we mean specific Strings, ints, URIs, and so on. "abc" is a
value, 456 is a value, new URI("http://...") is a value, and so on.)
Part 2
Include a screenshot for each of the following:
- On the command line of your computer, run
lswith the absolute path to the private key for your SSH key for logging intoieng6. - On the command line of the ieng6 machine, run
lswith the absolute path to the public key for your SSH key for logging intoieng6(this is the one you copied to your account onieng6usingssh-copy-id, so it should be a path onieng6's file system). - A terminal interaction where you log into your
ieng6account without being asked for a password.
Part 3
In 2-3 sentences, describe something you learned from lab in week 2 or 3 that you didn't know before.